After reading an article in Beecraft I decided to make a vaporiser for administering Oxalic Acid treatments to my colonies. I always found using the trickle technique in January to be a pain and thought that it had a detrimental effect on the state of my colonies. A recent study concluded that trickling Oxalic Acid could have the effect of reducing brood by 17%. Whereas there doesn’t seem to be the same impact from sublimation.
Design Considerations
I wanted to make one fairly cheaply with components that I could source easily.
After some experiments with different prototypes I decided to use an aluminium block and a diesel glow plug as the basis for the vaporiser. The other conclusion from my tests was that it was important to keep the overall weight of the block down as much as possible. You want the heat to go into vaporising the Oxalic Acid rather than heating the block of metal. So my refined design came out at 45g compared to the 120g version I started with.
But making it smaller meant I found I couldn’t use my fairly basic tools to machine the block it needed a CNC mill. Fortunately a friend offered to make the block for me.The thickness of the block means that the entrance bar will need to be removed to get the unit inside the hive. However, I have mesh floors so I will conduct some tests to see if the treatment can be successfully applied from beneath the hive floor.
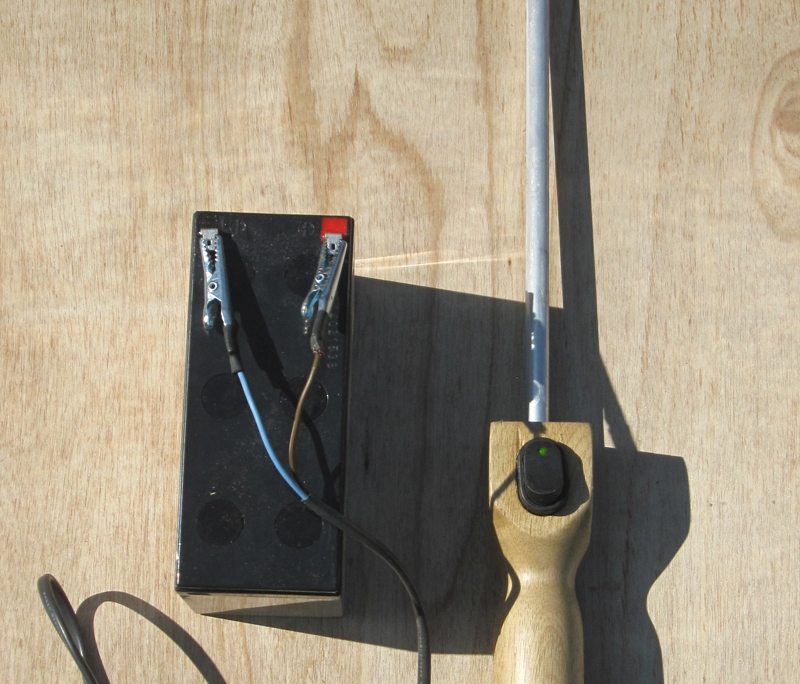
I wanted to run it from a 12v battery and decided that rather than using a car battery and trying to lug around the apiary I would get a small 12v motorcycle battery. As the glow plug draws 5A I opted for a version that is rated at 7A. A quick test connecting the 2 together got the plug glowing red hot in less than 20 seconds. The glowplug I choose was an NGK 6325 Y-103K to suit the dimensions of the block.
| Item | Quantity | Description | Comments |
|---|---|---|---|
| 1 | 1 | Aluminium block | 42mm x 36mm x 12mm |
| 2 | 1 | Aluminium hollow rod | 300mm x 10mm diameter |
| 3 | 1 | Wooden handle | 200mm x 40mm square |
| 4 | 1 | Rocker switch with LED | Rated for 12v |
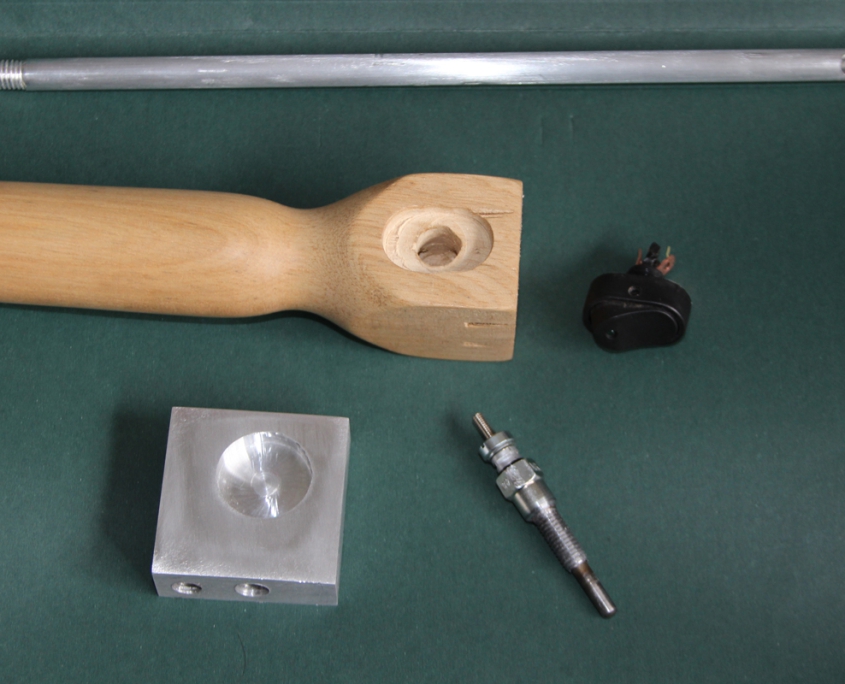
| 5 | 1 | Diesel glow plug | Model NGK 6325 |
| 6 | 1 | 2 core cable rated 13A | 1.5m length |
| 7 | Assorted clips | Crocodile & spade clips | |
| 8 | Heatshrink tubing | protect electrical connections | |
| 9 | 1 | 12v motorcycle battery | Rated at 7Ah |
| 10 | 1 | 12 v battery charger | Already had one |
Fabrication
From my research it looks like the Oxalic acid should be fully vaporised within 2 -3 minutes. So rather than having to disconnect the power by unclipping the battery connectors I decided to have a switch built into the handle. This makes the wiring assembly a bit tricky but gives a more elegant solution.
- Aluminium block –
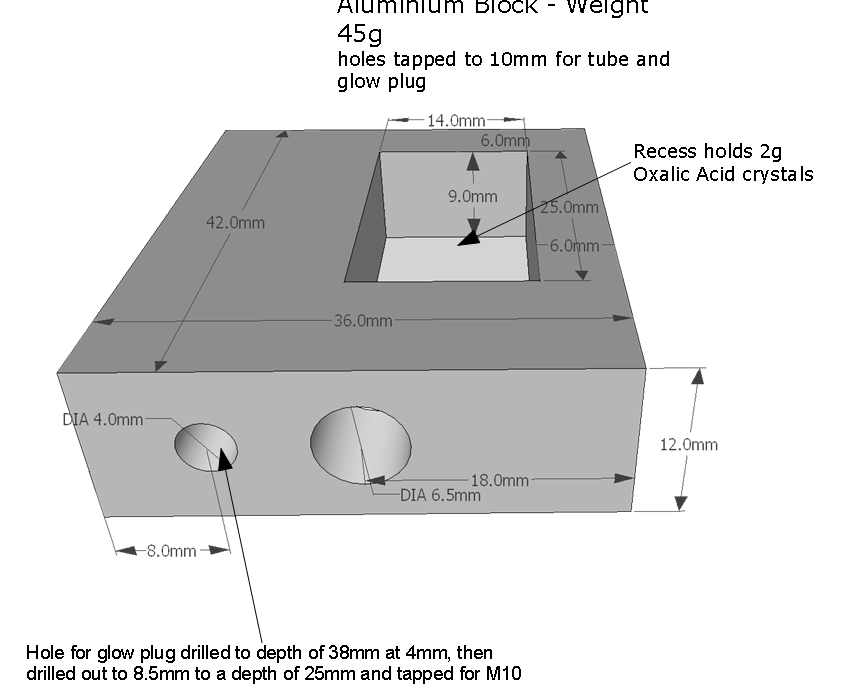
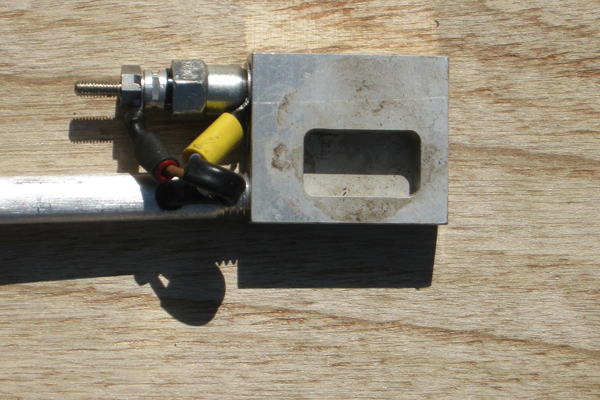
- A recess of 25mm x 14mm x 9mm deep is the right size to hold 2g of Oxalic Acid. In order to fit the glow plug I offset the recess (see photo). A friend CNC’d the block for me as one of the prototypes I tried to make indicated my basic tools weren’t up to the job.
- Drill and tap 2 holes for the metal rod and glow plug. One issue I faced is that the glow plug was M10 fine thread and my taps are for standard threads. However, I managed to buy a suitable tap for £2.
- Aluminium hollow rod – I wanted this to screw into the heating block and the handle so cut threads into both ends. The wiring runs through the rod (that’s why I chose a hollow one) and drilled a small hole at the end that screws into the block to route the wires through.
- Wooden handle – turned and shaped on the lathe. Drilled hole all the way through the block for the wiring. Routed the mortise slot to hold the rocker switch. Tapped the end to take the hollow rod.
- Wiring – very easy to connect everything with spade clips. The only fiddly bit is getting the wiring for the rocker switch in place. I used heat shrink tubing to protect all the connections.
- Epoxy is used to secure the rod and rocker switch in place.
Testing
Connecting everything up was a doddle and my initial test was with water which boiled dry in just over a minute. The Oxalic Acid took just over 2 minutes to vaporise completely.
For the complete design with a Sketchup plan of the measurements for the aluminium block please use the link:
 PDF Plan for Vaporiser Size: 414.4 KB


